How to enable Audit Trail functionality in Oracle apps
Step 1: Select
the module, the intended table belongs to, to be enabled for this
functionality.
Navigation:
System Administrator > Security > Audit Trail > Install
Query the module to be enabled:
Step 2: Create
the Audit Group where we can have single or multiple tables belonging to the
Application(module).
Navigation:
System Administrator > Security > Audit Trail > Group
Step 3: Select
the columns of the selected tables under Audit Group.
Navigation:
System Administrator > Security > Audit Trail > Tables
Step 4: Create
Audit Industry Template for the group that we have created. A single template
can have multiple groups.
Navigation:
System Administrator > Security > Audit Trail > Audit Trail Reporting
> Audit Industry Template
Step 5: Validate
the setup.
Navigation:
System Administrator > Security > Audit Trail > Audit Trail Reporting
> Audit Hierarchy Navigator
On this form, we can see the linking between
·
Audit Industry Template
·
Audit Group
·
Tables
·
Columns (of the tables) enabled for Audit trail
Step 6: Run the concurrent
programs to enable audit trail functionality for the above setups:
Please follow the sequence
1)
AuditTrail Update Tables (No parameters)
2)
AuditTrail Report for Audit Group Validation (Parameter
as Group Name)
Step 7: Perform
transaction in which, data in our required table will be populated/modified.
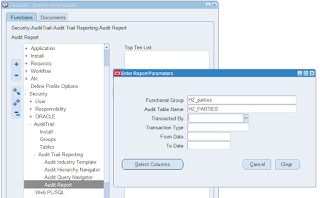
Step 8: Run the
report to print the audit trail.
Navigation:
System Administrator > Security > Audit Trail > Audit Trail Reporting
> Audit Report
Select the columns to be printed in report in the desired
sequence: Press “Select column” Button and the select the columns to be
printed.
Press Run Report Button.


